Thursday, December 29, 2011

Peyote vs Brick Stitch

While working on a bracelet that was part peyote and part brick stitch, I got to thinking about the differences in these two look alike stitches and thought I’d share my thoughts with you. So here's a graph you can use to make a pretty little iris, and if you stitch it both ways you'll see the differences for yourself.


Here are some differences I noticed, maybe you'll find others:

• Peyote is more difficult to start than brick stitch and it’s harder to keep your tension consistent in peyote than in brick stitch. On the other hand, stitching in peyote is considerably faster and it’s easier to “unstitch” peyote than brick.

• If you have trouble with odd count peyote, brick stitch might be a good alternative.

• Brick stitch decreases beautifully and, like peyote, can be worked on both sides of the first row.

• Brick stitch yields a firm surface while peyote yields a more flexible surface that drapes nicely. One or the other may be more desirable, depending on the application.

• When I joined a piece of peyote to a piece of brick stitch I was surprised to find a very slight difference in the way each piece reflected light; like velvet but less obvious.

• Running a row or two of brick stitch at the end of a band of peyote firms up the edge nicely. This is especially useful when you want to attach a clasp.

• Peyote graphs may be used for brick stitch by turning them sideways (and vice versa).

Happy stitching to all of you in 2012!

Monday, December 12, 2011

Magatama Necklace!

I told someone at Beadie's on Saturday that I'd send them the link to Smadar Grossman's tutorials. Now I've been stricken with CRS and don't know who to send it to. :-( So if it was you, here's the link.

BTW, if you were planning on shopping at Beadie's any time soon, better wait 'til she can replace all the stuff we bought Saturday, we didn't leave much. More beads! More beads! More beads! LOL!

Hope you all have a Happy Chanukah, Merry Christmas, and a Happy Kwanza...

Wednesday, November 30, 2011

More Horse Stuff

Someone suggested that the "Neptune's Steed" pendant I posted last would be more effectively photographed against a black background. She was so right! So here he is again - a much better pic this time.

Sunday, November 6, 2011

Neptune's Steed Pendant


This is a pendant I made for the Year Of Jewelry Project - it's my vision of the Walter Crane painting of Neptune driving all his horses through the surf.

It was quite a feat of engineering to produce this piece and took quite a while to develop. I learned a lot about combining wire work and bead work in the same piece while working on it and the workmanship isn't my best, but I expect my next piece using this method will be much neater, now that I know what not to do. ;-D

Bollywood Challenge

The entries for the ArtFire Beadweavers Guild "Bollywood" challenge are up for voting. See all the eye candy and vote for your favorite!

Here are some other links for the ArtFire Beadweavers Guild you might want to check out for news and more eye candy:
The Blog
Facebook Fan Page
Twitter

Saturday, October 29, 2011

Maven Meld Challenge

The deadline for the Maven Meld challenge entries is upon us and, by some miracle, I got mine in on time. You won't want to miss seeing all the stunning entries on the Maven Meld entries page.

I spent a lot of time "perfecting" my design but when I saw how gorgeous the other entries are, I feel like Wile E Coyote with a flock of roadrunner beaders leaving me in the dust! LOL!!! As for my entry, I used a component of Mikki Ferrugiaro's "Crab Chain" design, one of Mikki's focal snap clasp designs and Cynthia Newcomer Daniel's "Russian Snake Chain" tutorial.


Here's the prototype I made up first:

And here's the final design:


Deciding I didn't care for the "chain" part I replaced it with Cynthia Newcomer Daniel's Russian Snake Chain. I loved the look of the first focal snap which was based on Mikki Ferrugiaro's "Vintage" focal snap clasp, but decided it was a little too heavy for this choker and didn't hang quite right, so I replaced it with a variation on her "Victorian" focal snap clasp. This one turned out both lighter and flatter and consequently hung much better.


It's interesting to see how different the two look when made with different beads. I'm reasonably satisfied with the look of the final design, but think I'll make yet another one using pearls like I had in the pink one. It still has plenty of bling, but the pearls give it a somewhat softer look. Now what color should the next one be?

Friday, October 21, 2011

New Beadwork Collections

Life has been happening so much lately that I haven't had time to post, but I did want to let you know about two new ArtFire collections. One features orange beadwork for my orange loving beading buddy, Tanya. It's called "Orange You Beautiful"
Here's a piece from the collection. It's called "Ziangle 2-Hot Chilli" and was created by Dax Designs:

The other is a collection of tawny, beadwoven, wild animal prints called "Beading On The African Veldt" - just because I thought they were so interesting and wanted to share them with you.
Here's a piece from this collection. It's called "Exotic White Tiger Beaded Necklace" and was created by Forbesfarm:

ENJOY!

Tuesday, September 20, 2011

New Work


I've been working on clasps that don't look like clasps. Mikki Ferrugiaro has designed some focal clasps by beading over snaps and I've taken her snap idea and am running amok with it. ;-D Here is a bracelet I recently finished. In the second picture you can see the snaps. Such a simple idea, but so ingenious - go Mikki!

Tuesday, September 6, 2011

Bragging Again

My butterfly necklace was included in a new ArtFire collection, "For That Little Black Dress", curated by LHJewelryDesign for Girl's Night Out on ArtFire. It's a collection of handcrafted jewelry to wear with - you got it - that little black dress. ;-D I felt like going dancing when I saw this collection and hope you will too. You can see all the pretties here.

Saturday, August 27, 2011

Making a Beaded Bezel for a Drop Cabochon

Have you ever wondered how to make a beaded bezel for a teardrop cabochon? Here is a good video you might want to take a look at. Knowledge of peyote stitch will be helpful but not necessary.

Friday, August 26, 2011

Crayon Box Collection

By now my jewelry has been featured in so many ArtFire collections (brag, brag, brag LOL!) that I thought I ought to curate a collection myself. It's called "My Crayon Box" and you can see it here. Please let me know if you like it and feel free to suggest a theme you'd like to see in another collection.

Meanwhile, here's a pendant you might like.


Thursday, August 18, 2011

Yummy Eye Candy

Another one of my necklaces was just featured in an ArtFire collection and I'm so pleased! It's a beautiful collection of beadweaving and you can see it here.

I regret not posting much lately but I've fallen way behind on my Year Of Jewelry project submissions and I'm beading madly to catch up. Other people have been posting some gorgeous work though so you'll enjoy taking a peek there too.

Here's a close up of a choker I made recently that I like a lot.

Thursday, August 4, 2011

Leaf Corrections

Thanks to the sharp eyes of my friend Linda G, I need to make a couple of corrections. The most important one is #5. The illustration is right but the text should read: "Pick up 1 C and (purple) PDT the 3 Ms on the column directly below where you just came up. You will come out between the first and second M strung (first inside picot made)." Also, in the illustrations 9-13, the enter line of beads should be Cs, but they were Ms. Both are fixed now.

I hope if anyone else spots anything amiss you'll let me know, and please send me photos of your finished leaves and I'll post them here.

Happy beading!

Wednesday, July 27, 2011

St. Petersburg Openwork Leaf Tutorial

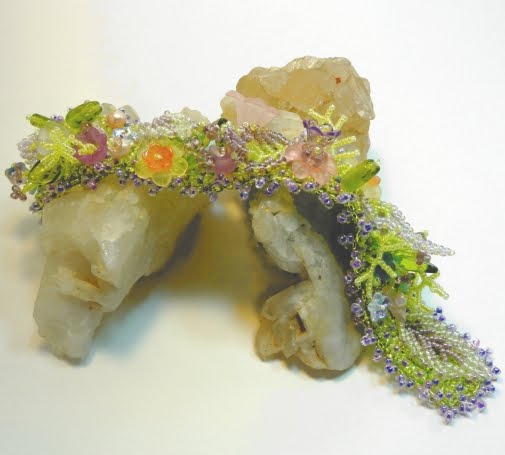
You can see a couple of them in the photo of my Spring Garden bracelet in my ArtFire studio and in an earlier post here.

Supplies:
Size 11 round seed beads – less than 200 – Main color
Size 15 round seed beads – less than 100 – Contrasting color
Note: I prefer the look of round beads for these leaves, but you can use whatever you like. Substituting, hexes or charlottes will give your leaf a little bling and matte beads will result in a more natural look.
Size 12 beading needles (2)
Beading thread – You’ll need about a yard (36”) for each leaf.
I use Fireline crystal for light colored beads and Fireline smoke for darker beads. (If in doubt, go with the smoke.)
Scissors
Thread burner (optional)

Abbreviations:
PT – Pass through (in the same direction you were going)
PBT – Pass back through in the opposite direction
PUT – Pass up through
PDT – Pass down through
M – Main color, size 11 round seed bead
C – Contrasting color, size 15 round seed bead

Let’s Get started!
1. Begin by threading a needle at each end of your thread.
2. String 6 Ms and 1C and move them to the center of your thread.
3. Using the right hand needle, skip the C and PBT the 6 Ms. The first pass is in red, the second in blue.
4. Skip the C and the first 2 Ms and PUT the next 2 Ms again (green). The last 2 Ms will sit beside the beads you just PUT as if to ladder or square stitch them. From here on you will need to be sure your stitching is snug, with no obvious thread showing between beads.


5. Pick up 1 C and (purple) PDT the 3 Ms on the column directly below where you just came up. You will come out between the first and second M strung (first inside picot made).
6. Pick up 1 C and PUT the 2 Ms beside where you just came down. You will come out at the top right corner of your work (first outside picot made).
7. String 4 Ms. PUT the first 2 strung (yellow). New beads 3 and 4 should sit beside beads 1 and 2 as if to ladder or square stitch them as in step 4. Remember to keep the square formed by the 4 new beads snugged down against the outside row of the square below.
8. Repeat steps 5, 6 and 7 until you have 7 outside picots, not counting the C at the very beginning.

9. String 8 Ms on one needle (aqua), PDT the C picot and the 2 outside Ms on the opposite side. PUT the 2 inside Ms (purple), the C picot and the the next 4 Ms to end at the center.
10. Pass the other needle BT the 8 Ms just added (aqua), the C picot and the 2 outside Ms on the opposite side. PUT the 2 inside Ms (purple), the C picot and the next 4 Ms to end at the center.
11. Use one needle to string about 16 C for the center vein; PDT the center column of beads where you first started stitching. Starting with the first M (orange), PBT the center column and the last 2C just strung.

Note: You may need to adjust the number of beads in the center vein to create a straight vein down the center of the leaf. Use however many seem to fit.
You may also need to adjust the number of beads going from the center vein to the inside picots as you work back up to the top, or if your stitching is slightly tighter or looser.


12. String 2C, PUT the first inner picot bead on the opposite side, back through the 2C just strung and the next bead of the center vein.
13. Repeat step 12 until you have joined all the inside picots.
14. Pass your needle up and over the thread holding the 8 beads across the top. PDT the center vein, through the C at the top of the center column (down at the bottom where you started) then back up through the center vein.
15. Tie the two thread ends together in a surgeon’s knot and trim.

HEY, you have a leaf! Congratulations!

Saturday, July 16, 2011

Challenging Events

An Ohio Beaders Challenge is not a contest or a swap. Rather, it is a call to members to engage in a jewelry making related undertaking that is a personal test of one's abilities or resources and is demanding but stimulating to those engaged in it. The purpose is to stretch your creative limits and encourage you to make something you may not make otherwise. Challenge photos from our most recent challenge will be posted soon in the Ohio Beaders Showcase. Photos from past challenges are already there.

The challenge, "What Was Old is New Again", ran from May 15 to July 15, 2011, and our pieces had to be made during that period with photos and descriptions of the completed pieces turned in by July 15th – no “dog ate my homework” stories accepted. ;-D For this challenge we could make jewelry, accessories or home décor but the focus of each piece had to be something at least 20 years old, although the supporting beads or wire could be new.

When my mother passed away, I found a 3¼” long, vintage "Evening In Paris" perfume bottle from the 1950s among her toiletries and immediately knew it had to be the focal element of a piece of cobalt and silver jewelry. Then when this challenge came up I knew just what I wanted to make.

The cobalt colored Swarovski crystals and silver lined cobalt glass seed beads are perfectly set off by the silvery palladium plated glass seed beads and the hand crafted Bali Silver clasp. There is actually some perfume left in the bottle, so I taxed my engineering skills to devise a method of attaching it in such a way that you can still remove the lid if you want to.


Right now the theme for our next challenge is being chosen, so stay tuned for more challenging events...

Saturday, July 9, 2011

Festival News

Today I went to the Youngstown Festival of the Arts where my friend Frances (Bebop Beads) had a booth and won the Best Fine Craft award. Nice going, Bebop! The festival was interesting - there were exhibits and performances from different ethnic groups, good music, good food, fine arts and crafts and quite a few jewelry vendors. You can see some pics from the festival here or here although there aren't any pics of jewelry booths.

I wore my bronze beadwoven bracelet and earrings
and got quite a few compliments on them. I wore my new butterfly necklace too (last post) and got even more compliments on it. I like the combination of wirework and beadweaving so I guess that's the direction I'll be taking with most of my new work.

Monday, July 4, 2011

Happy, Happy, Joy, Joy!

Evidently people are liking my work because it's been included in 2 more collections. I love butterflies and both of my butterfly necklaces have shown up in recent ArtFire collections - first the beadwoven one last week and my newest one today. Here's a pic of the new one...
and here's the other one...

Monday, June 13, 2011

For the Guys

I'm a "girlie girl" who loves pretty things so just about everything I make is for women. This time I decided to make my grandson a bracelet to commemorate his first Fathers Day. It's made of leather wrapped down the edges with antique copper wire and embellished with stone chips that I *think* are turquoise. I hope he'll enjoy wearing it.


Here's the little angel who made him a daddy...

Wednesday, June 8, 2011

Vintage China Challenge Entry

I've just finished my entry for the ArtFire Beadweavers challenge. The theme is "Antique China" and my entry is a tribute to Aynsley's popular Pembroke pattern. It's a beadwoven choker composed of seed beads, pressed glass and lucite and is woven in peyote, brick and freeform netting stitches and accented by St. Petersburg openwork leaves.

You can see all the entries and vote for your favorite here from June 14-26.

You can see a picture of the china pattern here

Tuesday, May 31, 2011

Hot Diggity Dog!

Wow, I'm over the moon! Another piece of my jewelry was included in an ArtFire collection. You can see the collection here.

Here's another view of my Waterfall creation:

Tuesday, May 10, 2011

New Coil and Spiral Wrap

I just learned to make these coiled and spiraled elements designed by Cindy Wimmer. I'm planning to create some new pieces based on variations of her design elements. Wahoo! New stuff to do!!! Meanwhile, here's my test piece - a bracelet.

Friday, May 6, 2011

Good News Again

Lucky me - I'm over the moon! My Spring Garden bracelet was chosen for another ArtFire showcase. Click here to see the collection. Since so many people have liked this bracelet (and the Winter Garden bracelet too) I think I'd better get busy and make the Summer and Fall garden bracelets to complete the series. It'll be time consuming (beadweaving always is) but I'll enjoy it since I LOVE flowers. Here's a pansy brooch I just made.

Friday, April 22, 2011

Hello Again

I'm so excited about my newest jewelry creation. I found this beautiful shell and some angelite beads to compliment it at a bead show I went to last month. I had a glimmering of an idea about how to use them but nothing solid until a couple of days ago when I found some very pale blue bicones that contributed to the waterfall idea I had germinating.

I went home and started by positioning the shell between two sections of wire wrap and the rest of the design suggested itself as I went along. It took a really long time to do the wire wrapping because I'd never tried suspending a focal between two otherwise separate sections or ending the wires by completely wrapping them before, and there was a lot of wrapping, taking apart and rewrapping going on. ;-D

Anyway, here's the finished product and I hope you like it as much as I do. (There's a "LIKE" button down at the very bottom of the page if you want to like it on Facebook.)

Wednesday, April 13, 2011

What next?

I love bead weaving but it takes forever to finish and I need more pieces in my ArtFire studio. I like wire work too and it's faster but this week's YOJ project theme is "Easter Parade" and bead weaving just feels like a better fit. What do you think? Here's a wirework pendant I recently made:
And here's some bead weaving:
Let me know what you think and if you liked this, please click the "Like" icon at the bottom of the page. If you want to visit my studio, you can click the Artfire URL at the left. There's also a place on the right to become a follower if you want to become one of my "groupies". LOL!!!

Sunday, April 3, 2011

Yea, I'm In

Oh boy, my Spring Garden bracelet was included in a Think Spring collection on ArtFire! To see the collection, click here:
A photo of the bracelet was in my post yesterday.

Saturday, April 2, 2011

Spring Thoughts

Yesterday was April 1st and it snowed. Is that Mother Nature's April Fool joke or what? At least the sun came out and melted it off but I can hardly wait for Spring to really arrive. Meanwhile I'm looking at my Spring Garden bracelet and pretending...

Friday, March 18, 2011

You asked for it - here's the first pic of my work . Stay tuned for more to come...

Pink Bracelet and Earring set
This was made for my DS who is also my BFF.


How to Make a Fern Using Seed Beads

Ever want to add a seed bead fern to your jewelry or wearable art? Here's how:

Seed Bead Fern

Abbreviations:
     PT Pass through in the same direction you were going.
     PBT – Pass through in the opposite direction from the way you were going. 

Note: blue lines in the diagram are going North (PT) and red lines are going South (PBT)


Directions:
1.    Using a stop bead and leaving about 6" of thread, string about 22 beads, then PBT the next to the last one strung. (This will be your main stem.)
2.    String 3 beads and PBT the first 2 strung (first branch made).
3.    PBT the next bead on the main stem.
4.    String 3 beads and PBT the first 2 strung.
5.    PBT the next 2 beads on the main stem.
6.    String 4 beads and PBT the first 3 strung.
7.    PBT the next bead on the main stem.
8.    String 4 beads and PBT the first 3 strung.
9.    PBT the next 2 beads on the main stem.
10. String 5 beads and PBT the first 4 strung.
11. PBT the next bead on the main stem.
12. String 5 beads and PBT the first 4 strung.
13. PBT the next 3 beads on the main stem.
14. String 6 beads and PBT the first 5 strung.     
15. PBT the next bead on the main stem.
16. String 6 beads and PBT the first 5 strung.
17. PBT the next 3beads on the main stem.
18. String 7 beads and PBT the first 6 strung.
19. PBT the next bead on the main stem.
20. String 7 beads and PBT the first 6 strung.
21. PBT the remaining beads on the main stem.
22. Remove stop bead and tie the beginning and ending threads together using a surgeon’s knot.

Voila! You have a fern!

Tuesday, March 15, 2011

Etsy

If you're an Etsy patron, you might want to go back into your records and remove any information you want to remain private. It appears that their new People Search roll out makes it possible for someone to access a user's personal information just by running a search for either their full name or user name, even when that user is just a buyer, not a vendor.

You can read about it here:
http://arstechnica.com/web/news/2011/03/etsy-users-irked-after-buyers-purchases-exposed-to-the-world.ars

Etsy claims to be concerned with privacy issues but I'm not putting any money on it and, in any case, for many the damage is already done. You can read about their response here:
http://arstechnica.com/web/news/2011/03/etsy-reacts-to-user-outrage-makes-changes-to-feedback-system.ars 

I'm so glad I chose to use ArtFire and not Etsy!
OK, my steam is blown off and now I'm back to beading...

Sunday, March 13, 2011

The Year Of Jewelry Project

I began participating in the YOJP just this past January. We've agreed to make and post pics of a new piece of jewelry every week for a year. So far I've been keeping up and have produced some good, some not so good, pieces.

This is my year to expand my jewelry making skills by learning different kinds of wire work and I'm enjoying the learning experience even though it's frustrating at times. Wire work is very different from the off loom beading I've been doing up until now, but it does have the advantage of saving money by making a lot of your own findings.

So far my favorite wire work is wrapping. Dale "Cougar" Armstrong has written a book, Wirework An Illustrated Guide To The Art Of Wire Wrapping. The jewelry in this book just takes my breath away and I think that wrapping will eventually become my forte.

Thursday, March 10, 2011

Finally

I've been trying to put this blog together for so long I thought it would never happen. I intend to share my jewelry making experiences so stay tuned for some good links, tutorials, and other jewelry related info. For now, just enjoy the photos.